
How to Use Custom Fonts in Squarespace 7.1: A Complete Step-by-Step Guide
Upload Your Custom Font.

To add your custom font in Squarespace, begin by locating the font file. Typically, it's named after your font and ends with extensions like OTF, WOFF, or TTF.
Access your Squarespace dashboard, and navigate to Design > Custom CSS.
Scroll down and locate the "Manage Custom Files" button.
Click "Add Images or Fonts" and choose your font file from the popup window.
Copy and paste the following CSS into the Custom CSS section:
@font-face {
font-family: 'Findream';
src: url(https://static1.squarespace.com/static/651005051aa9fb5b46ee5497/t/6527f6b29966df2c4ac419a0/1697117874577/Findream.ttf);
}
h1, h2, h3, h4, p {
font-family: 'Findream' !important;
}
.sqs-block-button-container a {
font-family: 'Findream' !important;
}
Replace "YOURFONT" with your custom font's name, and insert the URL to your font file between the brackets.
To get the URL, click the space within the brackets, then select your uploaded font from the "Manage Custom Files" menu. The system will auto-generate the URL.
Remember that you can upload font files ending in .WOFF, .OTF, or .TTF to Squarespace. Ensure you have the appropriate license for your font. If you need a new font, Creative Market offers various attractive and cost-effective options.
Implement Your Custom Font Using CSS.

After successfully uploading your font to Squarespace, the next step is to instruct Squarespace where to find the font and how to associate it with specific text elements on your website. This may involve some CSS adjustments, but don't worry; it's a manageable process.
To begin, we recommend creating a test styling page with various text elements such as H1, H2, H3, and body text. This way, you can witness real-time changes as you progress. Navigate to your Squarespace dashboard and access Design > Custom CSS. Here, paste the following code snippet into the Custom CSS box, or add it at the bottom if you already have existing code:
@font-face {
    font-family: 'FontTitle';
    src: url('FontURL');
}
h1 { font-family: 'FontTitle'; }
Here's how you customize the code for your font:
Replace 'FontTitle' with your font's name (e.g., 'JosefinSans').
Update the FontURL: Click on Manage Custom Files, select your font file, and observe the URL that auto-generates within the Custom CSS box.
Now, edit the CSS code to style different text elements as per your font preferences. By changing 'FontTitle' for each heading (H1, H2, H3) and 'P' (for body text), you'll see text elements transform with your chosen font.If you desire various fonts for different headings, you can upload multiple font files to your Squarespace site and repeat the above steps accordingly. Additionally, you can fine-tune attributes such as color and font size directly in the Site Style Settings. Explore Heading 1, Heading 2, and more to experiment with various font styles while retaining other settings intact.
Custom Fonts on Your Site.
If You Want To apply additional CSS styling to your fonts, such as adjusting their size, weight, or letter spacing. However, I recommend using Squarespace's font settings for these modifications rather than relying solely on CSS. Remember, the golden rule of CSS is to use it sparingly when necessary.
In some situations, CSS styling becomes essential. Squarespace dictates that any styling changes made to one Heading or Paragraph style must apply to all instances of that style throughout your site. This restriction can limit your design options.
For instance, suppose you want to style Paragraph One with capitalization and adjusted letter spacing. If you use Squarespace's standard settings, all of your paragraph text will appear like this:
To achieve a unique style for Paragraph One without affecting other paragraphs, CSS comes to the rescue:
.sqsrte-large {
font-weight: 600;
letter-spacing: 0.1em;
text-transform: uppercase;
}
However, it's crucial to avoid using CSS for font size adjustments. Squarespace already allows individual font size changes through its native settings, and unnecessary CSS may disrupt these settings later on.
Customizing Your Squarespace Site Header Fonts.

The site header, located at the top of your Squarespace website, typically consists of various elements like navigation links, a text logo, and possibly an announcement bar. To customize the fonts for each of these elements with your custom font, utilize the CSS snippets provided below.
// Site Title //
.header-title-text a {
font-family: YOURFONTFAMILY !important;
}
// Site Navigation //
.header-nav-item a {
font-family: YOURFONTFAMILY !important;
}
// Button //
.header-actions-action .btn {
font-family: YOURFONTFAMILY !important;
}
// Announcement Bar //
.sqs-announcement-bar-url a {
font-family: YOURFONTFAMILY !important;
}
Ensure to replace YOUR FONTFAMILY with the name of your selected custom font.
Changing Font Styles for Buttons in Squarespace.
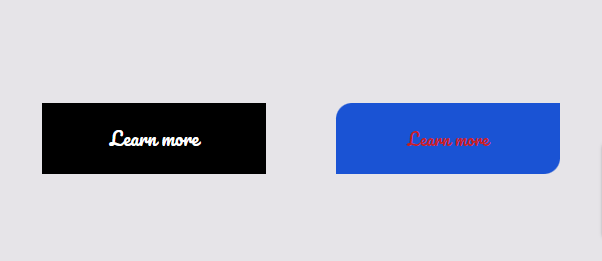
For Squarespace, you have various button options, including Small, Medium, and Large (or Primary, Secondary, and Tertiary, depending on your Squarespace editor). Here are unique CSS snippets to modify the font for each type:
Small or Tertiary Button Font Customization
css:
.sqs-block-button-element--small, .sqs-button-element--tertiary {
  font-family: YOURFONT !important;
}
Medium or Primary Button Font Customization
css:
.sqs-block-button-element--medium, .sqs-button-element--primary {
  font-family: YOURFONT !important;
}
Large or Secondary Button Font Customization
css:
.sqs-block-button-element--large, .sqs-button-element--secondary {
  font-family: YOURFONT !important;
}
Adjust your button fonts with ease using these CSS tweaks in Squarespace.
Modifying Fonts in Your Squarespace Blog Posts.
To ensure your custom font is consistently used throughout your Squarespace blog, you'll need to apply it in various places. These areas include the blog page titles and descriptions, as well as the post titles featured on individual article pages.

Here are the CSS snippets for each of these elements:
Blog Page Post Title
Css:
.blog-title {
  font-family: YOURFONT !important;
}
Blog Page Post Descriptions
Css:
.blog-excerpt p {
  font-family: YOURFONT !important;
}
Blog Page Read More Link
Css:
.blog-more-link {
  font-family: YOURFONT !important;
}
Blog Post Entry Titles
Css:
.blog-item-title h1.entry-title {
  font-family: YOURFONT !important;
}
Simply replace YOURFONT with the name of your custom font to maintain a consistent typographic style throughout your Squarespace blog.
Benefits of Using Custom Fonts in Squarespace 7.1
How Do Custom Fonts Improve Your Website?
Branding Improvement: It helps you stand out with a custom personality. Serif fonts, for instance, suggest tradition, while sans-serif fonts have a contemporary feel.
Enhance User Experience (UX): Readable and appropriate fonts make it easy for users to digest content, leading to reduced bounce rates and improved engagement.
Enhanced SEO Advantages: While not a directly affecting ranking factor, improved text legibility and user engagement positively affect search engine performance in this indirect manner.
Keep Brand Consistency Across Platforms: Custom fonts help keep the design consistent, such as how it aligns your digital space to the offline branding.
For example, Google Fonts can be very easily paired with Squarespace and customized. In addition to that, Different typography websites have a better user retention as fonts create an emotional preference for users.
Frequently Asked Questions
-
To add a custom font in Squarespace:
Go to Design > Custom CSS
Click Manage Custom Files and upload your .ttf, .woff, or .otf font file
Paste the following CSS code:
@font-face { font-family: 'YourFontName'; src: url('your-font-url'); }
Then apply your font like this:
h1, h2, p { font-family: 'YourFontName' !important; }
Replace 'YourFontName' with your font's name and insert the correct URL from the uploaded file.
-
Squarespace supports .TTF.WOFF and OTF font file types. These can be uploaded via Manage Custom Files under the Custom CSS panel.
-
After uploading your font in Design > Custom CSS, click inside the CSS editor, then click “Manage Custom Files” and choose the font. Squarespace will automatically generate the font file URL for you.